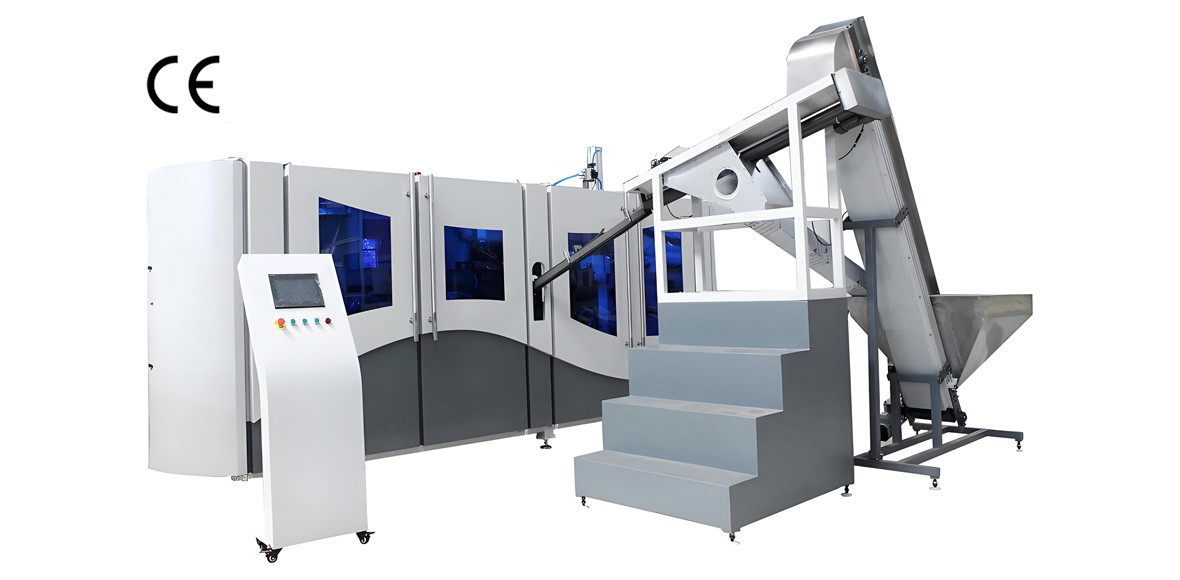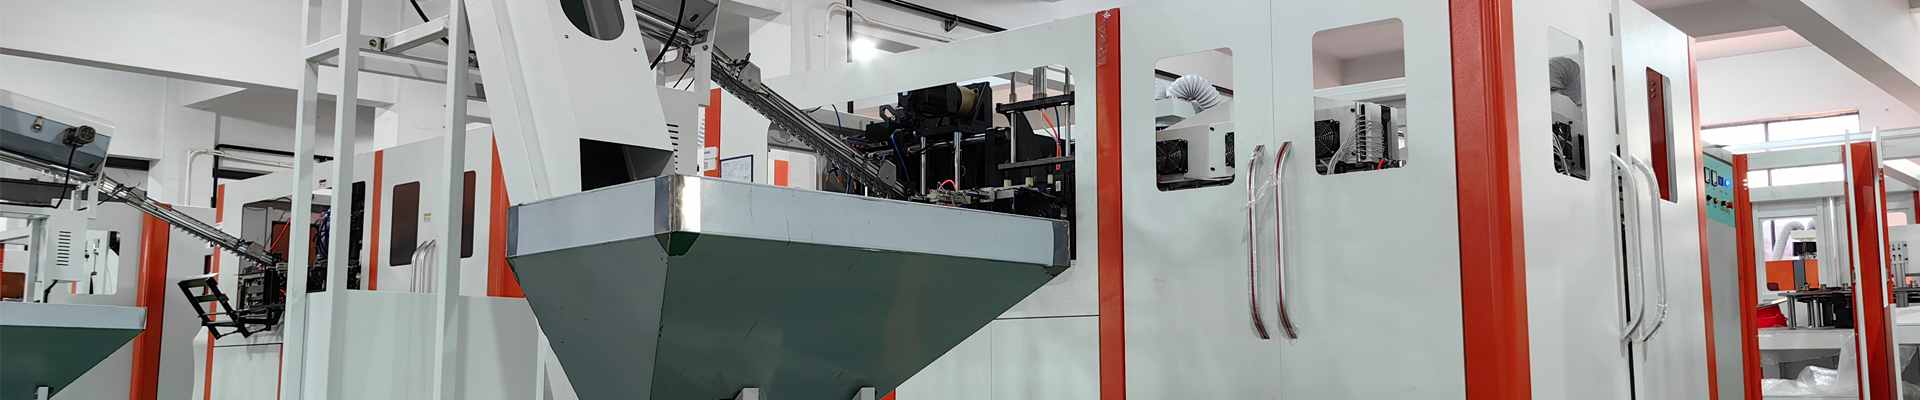
Starting a PET bottle blowing business does not require a premium, fully automatic plant on day one. A well-planned low budget startup scheme lets a first-time entrepreneur enter the market with a modest investment grade, learn the process, build a customer base, and then scale up as orders grow. This guide is written for beginner PET bottle blowing entrepreneurs who want a realistic, step-by-step entry plan rather than an idealized high-output specification. YuDa, a Wanplas factory with more than 20 years of experience in PET bottle blow molding machines and exports to 60 plus countries, built this scheme around the two most forgiving entry routes: the semi-automatic two-step process and the entry-level full automatic linear machine. By the end of this article you will understand what to decide before buying anything, how to compare three startup tiers, what equipment you actually need, how to size the air compressor correctly, how to choose molds, how to climb the yield curve, and exactly which YuDa machine families fit a low budget launch.
A PET bottle is made by stretch blow molding a heated PET preform. In the two-step process, the preform is produced separately and then reheated and blown into the final bottle shape. This separation is the friendliest starting point for beginners because it splits the business into a blowing task you control and a preform supply task you can source. The whole idea of a low budget scheme is to keep the controllable part simple, standardize the bottle shapes you offer, and avoid the heavy fixed cost of making preforms yourself until the market proves the volume. Throughout this guide, investment levels are expressed as relative grades Low, Medium, and High instead of exact amounts, because the right entry point depends on your local labor, power, and space cost, which vary widely by region.
Why PET in the first place? Polyethylene terephthalate is a clear, strong, lightweight, and recyclable thermoplastic whose molecular chains can be stretched in two directions during blowing. That biaxial orientation is what gives a thin PET bottle its surprising top-load strength and drop resistance while using very little material per bottle. For a beginner, the practical takeaway is simple: the quality of the finished bottle depends less on expensive machinery and more on correct preform temperature, balanced blowing pressure, and a well-cooled mold. Those are skills you can learn on an entry-level machine, which is exactly why PET bottle blowing is one of the most accessible ways to enter plastic packaging production.
Four Things to Clarify Before You Start
Before ordering any machine, a beginner entrepreneur should answer four practical questions. These decisions shape every later choice, from the machine family to the floor area and the number of operators. Getting them right early prevents the most expensive mistake in this business: buying equipment that does not match the actual local demand.
1. Local market capacity and bottle shape demand
The first question is what bottles your local market actually buys. Bottled water, carbonated and juice drinks, edible oil, daily chemical detergents, and agricultural or chemical small packs all use PET, but they differ in volume range, neck finish, and wall requirement. A region dominated by 0.5 liter water bottles needs a different cavity and preform weight than a region that consumes 1.5 liter edible oil or 5 liter detergent jugs. Map the top three bottle types you can realistically sell, estimate the monthly volume range in thousands of bottles, and write down the volume segments. This simple market sketch becomes the basis for capacity planning.
2. Preform purchase versus self-production
The second decision is whether to buy PET preforms or inject them yourself. Self-production means adding an injection molding machine, a preform mold, a chiller, and a crystallizing dryer, which raises the investment grade from Low to High and adds a second process to master. For a beginner, buying preforms from a qualified supplier keeps the startup focused on blowing, shortens the time to first sale, and converts a fixed cost into a variable cost that scales with orders. Wanplas, as the parent brand with a broad plastic machinery network, can advise on matched preform sourcing and on the right time to bring preform making in-house once volume justifies it.
3. Where the orders come from
The third question is your order source. Typical beginner channels are local bottled water plants, small beverage and juice makers, daily chemical and detergent workshops, and trading companies that re-export private-label bottles. Each channel has different expectations: a water plant may demand consistent 0.5 to 1.5 liter bottles at steady volume, while a trader may ask for many small custom runs. Knowing your primary channel tells you whether to optimize for a single high-run shape or for fast changeover between shapes. It also influences the yield and appearance standard you must hold.
4. Site and power conditions
The fourth decision covers the physical site. A semi-auto two-step workstation needs roughly 20 to 30 square meters of clean, dry floor, plus storage for preforms and finished bottles. More important is power: blowing machines and especially air compressors draw three-phase electricity, and the compressor is the largest steady load. Check the available supply voltage, phase, and rated current before choosing a machine, because an undersized supply will bottleneck the whole line regardless of how good the blow machine is. Also confirm stable compressed air and a drainage route for the chiller if you later add cooling.
Clarify market, preform strategy, order source, and site power before you spend anything. These four answers convert a vague “I want to make bottles” idea into a concrete machine specification.
Three-Tier Startup Scheme Comparison
A low budget startup should be planned as a tier, not a single machine. The table below compares three entry schemes using relative investment grades only, never exact amounts. Scheme A is the lightest way to test the water. Scheme B adds automation to reduce labor. Scheme C steps into a genuine entry-level full automatic line for higher, steadier output. Use the relative grades to match your own cash and order outlook, not to chase the top tier prematurely.
Comparison dimensions explained
Capacity is given in bottles per hour (bph). Operators are per shift. Unit energy is expressed as kilowatt-hours per one thousand bottles, a useful normalized figure because it removes bottle-size distortion. Yield is the realistic good-bottle ratio a trained beginner can hold after the first month. Floor area is the machine envelope plus basic handling space. Upgrade elasticity describes how easily the scheme can grow into the next tier.
| Dimension | Scheme A: Semi-Auto Two-Step | Scheme B: Upgraded Semi-Auto | Scheme C: Entry Full Automatic |
|---|---|---|---|
| Capacity (bph) | 600 to 1,200 | 1,200 to 2,000 | 2,000 to 4,000 |
| Operators per shift | 2 to 3 | 1 to 2 | 1 |
| Unit energy (kWh / 1,000 bottles) | 40 to 60 | 30 to 45 | 25 to 35 |
| Yield (good-bottle ratio) | 95 to 97 percent | 96 to 98 percent | 98 to 99 percent |
| Floor area (m2) | 20 to 30 | 30 to 45 | 45 to 70 |
| Upgrade elasticity | High | Medium-High | Medium |
| Relative investment grade | Low | Medium | High |
Scheme A is the recommended first step for almost every beginner because it preserves optionality: if the market responds, you upgrade; if it does not, your downside is contained. Scheme B is the right move when labor is scarce or expensive and you already see steady orders. Scheme C makes sense when a single customer commits to volume that needs one operator and a stable 2,000 to 4,000 bph. Notice that the energy per thousand bottles keeps falling as you automate, which is one of the quiet paybacks of moving up tiers.
Semi-Auto Two-Step Process Walkthrough
The semi-automatic two-step process is the backbone of a Low grade startup. Understanding each stage helps you set parameters correctly and diagnose problems later. The sequence is: dry and condition the preform, reheat it in the oven, place it into the blow mold, clamp, stretch and blow, exhaust, open, and take out the bottle.
Step by step
First, the PET preform must be dry. PET is hygroscopic, and residual moisture causes haze and weak bottles, so preforms are stored dry and, when needed, conditioned in a dehumidifying environment. Second, the preform enters the heating oven where infrared lamps raise the body temperature to roughly 95 to 110 degrees Celsius. The neck is shielded by a cooling collar so it stays dimensionally stable. Heating time is typically 20 to 60 seconds depending on preform weight and wall. Third, the operator places the heated preform into the blow mold by hand. Fourth, the mold closes. Fifth, a stretch rod pushes the preform downward while low-pressure pre-blow (about 8 to 12 bar) begins to shape it, followed immediately by high-pressure blowing at 25 to 30 bar that presses the PET against the cold mold wall and sets the shape. Sixth, the air exhausts. Seventh, the mold opens and the finished bottle is taken out.
Two-step means preform making and bottle blowing are separate processes. For a beginner, buying preforms and owning only the blowing half is the simplest, lowest-risk entry.
Parameter table by volume segment
The table below gives typical starting parameters for common volume segments. Treat them as a tuning baseline, not a fixed recipe, because preform design, ambient temperature, and lamp condition all shift the optimum. Always adjust while watching bottle clarity, base formation, and wall distribution.
| Volume segment | Preform gram weight (g) | Heating time (s) | Blow pressure (bar) | Single mold cycle (s) |
|---|---|---|---|---|
| 0.1 to 0.5 L | 12 to 18 | 20 to 30 | 25 to 30 | 2.0 to 2.8 |
| 0.5 to 1.0 L | 16 to 28 | 25 to 40 | 25 to 30 | 2.5 to 3.2 |
| 1.0 to 2.0 L | 28 to 48 | 35 to 55 | 25 to 30 | 3.0 to 4.0 |
| 2.0 to 3.0 L | 45 to 70 | 45 to 60 | 25 to 30 | 4.0 to 5.5 |
The pre-blow stage at 8 to 12 bar initiates the preform expansion and reduces the shock of the high-pressure stage, which protects the neck and improves base formation. The high-pressure stage at 25 to 30 bar does the real work of conforming the PET to the mold surface and freezing the molecular orientation. If the bottle body turns white, the usual cause is insufficient preform temperature or inadequate high-pressure air, both of which you will learn to read with practice.
Minimum Viable Equipment List
A beginner line is more than a blow machine. The list below is the minimum viable set for a semi-auto two-step startup. Each item lists its function and the lowest acceptable specification, so you can plan procurement without overbuying. Keep the set tight; add extras only when a clear production need appears.
| Equipment | Function | Minimum specification |
|---|---|---|
| Semi-auto blow machine | Clamps the mold, stretches and blows the preform into the bottle | Single cavity, manual load, 0.1 to 2.0 L range |
| Heating oven | Reheats the preform body to blowing temperature | Infrared lamp banks, neck cooling collar, adjustable zone power |
| High-pressure air compressor | Supplies stretch and blow air at 25 to 30 bar | 3.0 to 4.0 MPa discharge, sized by bottle volume times bph |
| Air receiver tank | Dampens pulsation and buffers peak demand | Volume matched to compressor, rated above max working pressure |
| Refrigerated dryer and filter | Removes moisture and oil from the air stream | Dew point around 3 to 10 degrees Celsius, coalescing filter |
| Water chiller | Cools mold and compressor, stabilizes cycle | Adequate cooling capacity for mold and air after-cooler |
| Blow mold | Defines the bottle shape and surface | One cavity, aluminum or steel, matched neck finish |
| Simple bottle conveyor or rack | Collects and transports finished bottles | Roller table or gravity rack, low cost |
Notice that the air preparation items (compressor, tank, dryer, filter, chiller) are roughly half the bill of a beginner line in terms of footprint and attention. Skipping or under-sizing any of them is the fastest route to unstable output. A disciplined beginner buys the complete minimum set rather than a cheap blow machine paired with a weak compressor.
The Air Compressor Trap for Beginners
If there is one component that decides whether a beginner line runs at all, it is the high-pressure air compressor. PET stretch blow molding is air-hungry: every bottle consumes a fixed volume of compressed air at 25 to 30 bar, and the compressor must deliver that volume continuously, not just in bursts. Undersizing it is the single most common and most damaging mistake in a low budget startup.
How to estimate air volume
A practical estimate multiplies the bottle internal volume by the target bottles per hour and a process factor that accounts for stretch, blow, and losses. In plain terms, the larger the bottle and the higher the hourly count, the more cubic meters per minute of free air the compressor must supply. A 0.5 liter bottle at 1,000 bph needs far less than a 1.5 liter bottle at 2,000 bph. The safe method is to calculate the total free-air demand from your chosen volume segment and bph, then select a compressor whose delivered capacity at 3.0 to 4.0 MPa exceeds that demand with headroom for wear and warm days. YuDa application engineers routinely help beginners size this correctly so the machine is never air-starved.
Pressure grade and dew point
The blowing stage needs 25 to 30 bar, which is why the compressor discharge is specified at 3.0 to 4.0 MPa. A general workshop compressor rated only for 8 to 10 bar cannot blow bottles no matter how large its tank. Equally important is air quality: moisture in the line causes haze, spotting, and valve freeze, while oil contaminates the bottle interior. A refrigerated dryer holding dew point around 3 to 10 degrees Celsius and a coalescing filter are not optional extras for food and beverage bottles; they are part of a compliant, stable line.
The air receiver and after-cooler matter too
Beyond the compressor itself, two supporting items decide daily stability. The air receiver tank smooths the pulsating demand of each blow stroke; without enough buffered volume, pressure dips between bottles even when the compressor nameplate looks adequate. The after-cooler and refrigerated dryer together protect dew point, because hot compressed air carries far more moisture that must be removed before it reaches the bottle. A beginner who sizes only the compressor and neglects the tank and drying set will still see haze and inconsistent cycles. Treat the air system as one integrated unit, not a list of separate boxes.
What happens when the compressor is too small
An undersized compressor produces three visible failures. First, bottles fail to form completely because the high-pressure stage cannot reach the required pressure, leaving short shots and weak corners. Second, the bottle body turns white because the PET is blown at too low a pressure and crystallizes instead of orienting. Third, the cycle time stretches because the system waits to rebuild pressure between bottles, cutting real output far below the nameplate. In all three cases the fix is correct air volume and pressure, not a different blow machine.
Size the compressor to the bottle, not to the budget. An air-starved line loses more in wasted preforms and lost orders than the saving from a smaller compressor.
Mold Entry: Start Simple, Standardize Later
The blow mold is the part that defines your product, so mold strategy deserves its own thinking. For a beginner, the rule is start with one cavity, learn the shape, then standardize.
One cavity to start
A single-cavity mold is the cheapest and fastest way to begin. It matches the manual semi-auto workflow, keeps changeover simple, and lets you validate one bottle shape thoroughly before committing to more cavities. When you move to a multi-cavity full automatic machine later, the same bottle design transfers directly, so the early learning is not wasted.
Aluminum versus steel mold
Aluminum molds are lighter, cheaper, and faster to machine, which suits short runs and frequent shape trials. Steel molds cost more and take longer to make, but they resist wear far longer and hold tight tolerances through very high cavity counts. For a beginner who is still learning and changing shapes, aluminum is the sensible first choice; for a settled high-volume shape on a full automatic line, steel earns its higher grade through lifespan. The table below contrasts the two for planning.
| Factor | Aluminum mold | Steel mold |
|---|---|---|
| Initial cost grade | Low | High |
| Machining lead time | Short | Long |
| Service life (cavity count) | Moderate | Very high |
| Best use | Trials, low volume, frequent change | Settled high-volume shapes |
Neck finish and standardization
The neck finish is the most standardized part of a PET bottle, and standardizing it is the cheapest way to cut changeover time. Most water and beverage bottles use a small set of common neck finishes, so committing to one or two finishes lets you serve many customers with far fewer mold variants. Keep the neck thread, support ring, and sealing surface consistent across your shape family, and let only the body volume and contour vary. This discipline pays back directly in faster mold swaps and steadier yield, which is exactly what a Low grade startup needs.
Changeover time and shape standardization
Every mold change costs downtime: the mold must be installed, the heater profile reset, and the first bottles scrapped until parameters settle. A beginner should therefore limit the active shape set to a few generalized bottles rather than chasing every custom request. Standardizing on one neck finish and a small family of volumes lets you swap molds quickly and keep yield high. As volume grows, you justify a second mold and a faster changeover routine.
Yield Ramp-Up and Defect Troubleshooting
No beginner line starts at 99 percent yield. The yield curve climbs as the operator learns heater balance, pressure timing, and mold temperature. Expect 90 to 95 percent in the first week and 96 to 98 percent after a month of steady runs. The troubleshooting table below lists the common beginner defects, their likely causes, and the first remedy to try, so you spend less time guessing.
| Defect | Likely cause | First remedy |
|---|---|---|
| Bottle body turns white | Preform too cold or low blow pressure | Raise oven temperature or check compressor pressure |
| Wall thickness eccentric | Uneven heating or off-center preform load | Balance lamp zones; check preform seating |
| Uneven base or weak bottom | Stretch rod timing or low pre-blow | Adjust stretch rod stroke and pre-blow pressure |
| Neck deformation | Neck cooling insufficient or over-blow | Improve neck cooling collar; reduce pressure slightly |
| Stretch rod scratch | Rod misaligned or preform too hot | Re-center rod; lower heating at the base zone |
| Difficult demolding | Mold too warm or insufficient exhaust | Lower mold temperature; verify exhaust timing |
Most beginner defects trace back to three variables: preform temperature, blow pressure, and mold temperature. Learn to read the bottle and adjust one variable at a time. Randomly changing several settings at once is the main reason a line stays unstable for weeks. Keep a simple log of oven power, pressure, and cycle for each shape; that log becomes your most valuable operational asset as you grow.
A Staged Upgrade Path
A low budget scheme is not a dead end; it is the first rung of a ladder. The sensible path is semi-auto, then add automatic preform loading, then add cavities, then switch to a full automatic line. Each step has a trigger so you invest only when the market justifies it.
Step one to step two: add an automatic preform loader
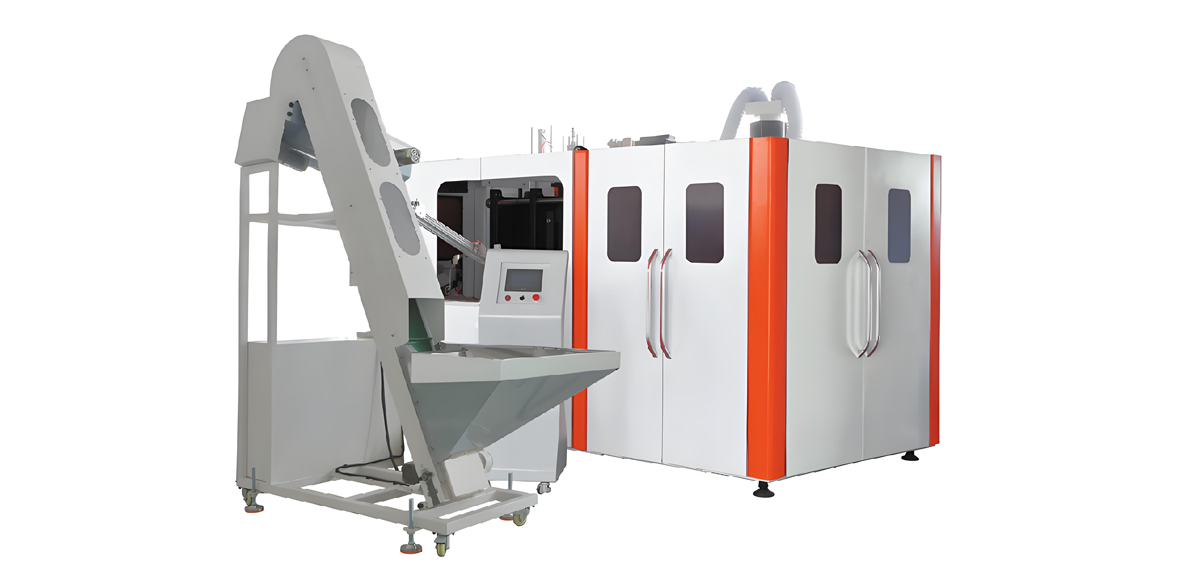
The first upgrade is usually an automatic preform loader and oriented feeding, which removes the manual placing of hot preforms. Trigger: labor cost or availability becomes the bottleneck, or you want to free an operator. This keeps the same blow machine and mold while lifting effective bph and consistency.
Step two to step three: add cavities
Next, move from single cavity to double cavity on a semi-auto or to a multi-cavity full automatic linear machine. Trigger: a single customer or channel commits to steady volume above roughly 2,000 bph, or you are running extra shifts just to keep up. Multi-cavity blowing improves unit energy and frees floor space per bottle.
Step three to step four: full automatic line
Finally, a full automatic linear blow machine with servo drive and remote monitoring handles 2,000 to 4,000 bph with one operator and steadier yield. Trigger: customer acceptance requires consistent high yield and documented process control, or order volume supports the higher grade. YuDa’s modular design keeps changeovers and maintenance cost-efficient across this path, so earlier molds and know-how carry forward.
Upgrade on evidence, not ambition. Each step should be justified by a measured order-volume threshold, which keeps the low budget discipline alive even as you grow.
A useful habit is to document the trigger for each upgrade in your production log. Write down the steady monthly volume, the number of shifts worked, and the reject rate at each stage. When two consecutive months show the line running at or above its practical limit with acceptable yield, that is the evidence to move up a tier. This written record also helps when you later discuss capacity with YuDa engineers, because you can show real numbers instead of a vague feeling that output is “not enough.”
YuDa Machines for a Low Budget Start
YuDa, a Wanplas factory, designs its PET bottle blow molding range specifically to support this kind of staged entry. Two families fit a beginner launch especially well: the Semi-auto Series for the Low and Medium grades, and the Standard Speed Series full automatic for the High grade entry. Both share YuDa’s modular philosophy, so molds and process knowledge transfer as you upgrade.
YuDa Semi-auto Series
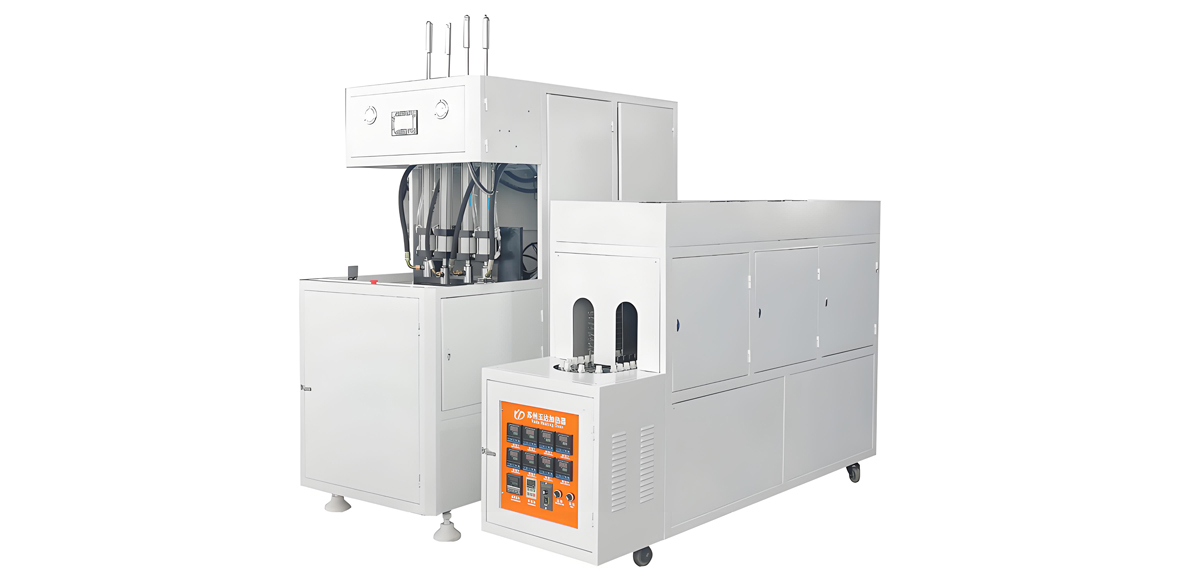
The YuDa Semi-auto Series is the natural core of Scheme A and Scheme B. It is built for small enterprises, ships ready to run, and keeps the procurement grade Low while delivering the 600 to 1,200 bph (up to 2,000 bph with the loader upgrade) a beginner needs. The machine pairs a manual-load blow station with an adjustable infrared heating oven, and it is the easiest platform to learn heater balance and blow timing on. The specification below is representative of a typical single-cavity configuration in this series.
| Specification | YuDa Semi-auto Series (typical single-cavity) |
|---|---|
| Cavity number | 1 (single cavity, manual load) |
| Volume range | 0.1 L to 2.0 L |
| Capacity | 600 to 1,200 bph (up to 2,000 bph with loader) |
| Installed power | 1.5 to 2.2 kW (blow machine plus heater) |
| Air consumption | 0.6 to 1.2 m3/min at 2.5 to 3.0 MPa |
| Overall dimensions (approx.) | 1,500 x 650 x 1,900 mm |
YuDa Standard Speed Series (entry full automatic)
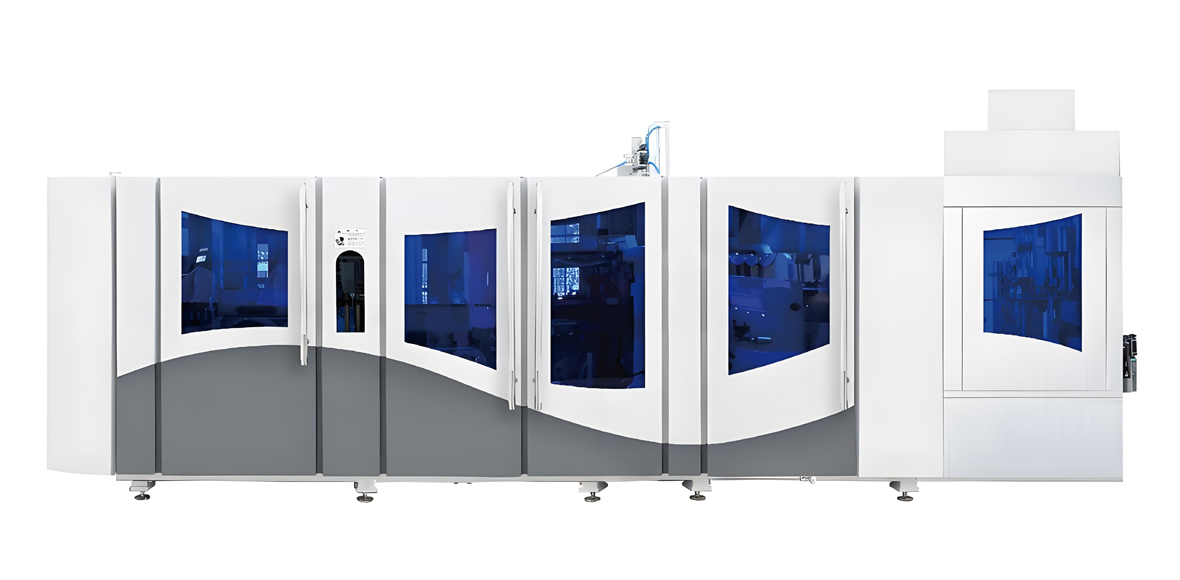
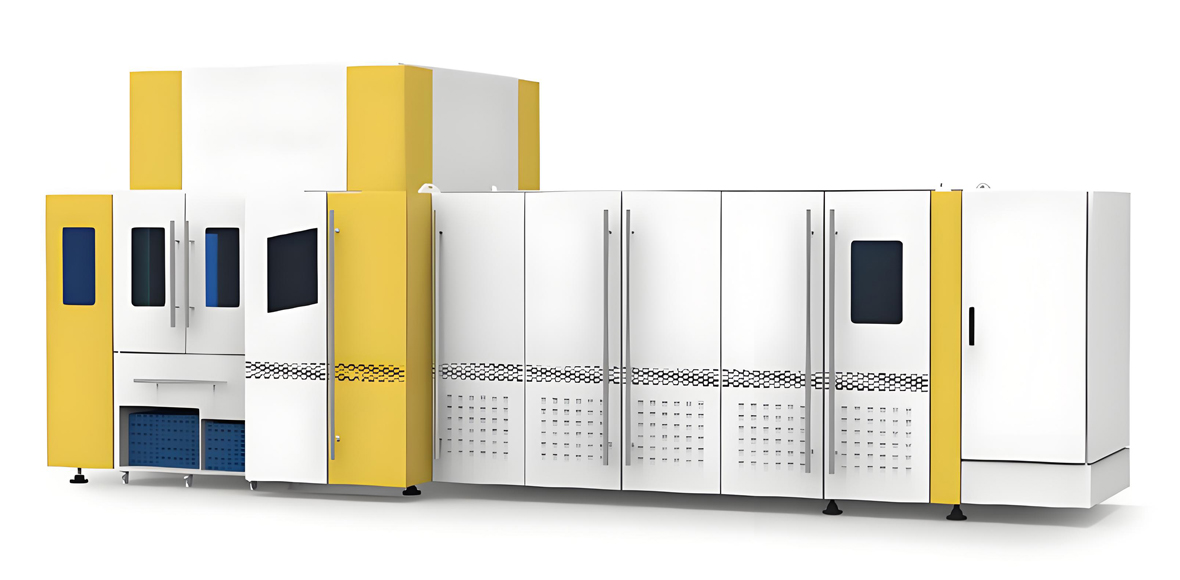
When orders cross the threshold for Scheme C, the YuDa Standard Speed Series full automatic is the logical next machine. It is a full automatic linear blow machine with advanced heating and energy-saving technology, and the entry two-cavity configuration delivers 2,000 to 4,000 bph with a single operator. Its heater distance is minimized to improve electricity efficiency compared with conventional heating ovens, and the modular build keeps changeovers and maintenance straightforward. The specification below is representative of the entry two-cavity configuration.
| Specification | YuDa Standard Speed Series (entry 2-cavity) |
|---|---|
| Cavity number | 2 |
| Volume range | 0.2 L to 2.0 L |
| Capacity | 2,000 to 4,000 bph |
| Installed power | 12 to 18 kW (heater plus machine) |
| Air consumption | 1.6 to 2.4 m3/min at 2.5 to 3.0 MPa (high-pressure blowing) |
| Overall dimensions (approx.) | 2,200 x 1,500 x 2,000 mm |
Both families sit inside the Wanplas group quality framework, which means shared service promises and a consistent spare-parts policy. For a beginner, that continuity matters: the support you build at the semi-auto stage carries into the full automatic stage without relearning a new supplier relationship.
Application Industries
PET bottles serve a wide set of industries, and a beginner line can serve several of them with a small shape set. YuDa machines are used across the following application fields, which also show where your early customers are likely to come from.
- Bottled drinking water — the largest and most forgiving beginner market, dominated by 0.3 to 1.5 liter round bottles.
- Carbonated and flavored beverages — need consistent wall and base strength; a good second step once yield is stable.
- Edible oil — typically 1.0 to 5.0 liter bottles with specific neck finishes and stacked base support.
- Daily chemical detergents — handles, ergonomic grips, and larger volumes suit small daily chemical workshops.
- Agrochemical and chemical small packs — require chemical-resistant PET and tight neck sealing for safe transport.
For bottled water and beverage filling, Wanplas can connect you with matched filling and capping capability from the wider group network, so a beginner can offer a more complete package as orders grow. Keep the earliest runs on water and standard beverage bottles, because their shape tolerance is the most beginner-friendly.
Requirement to Model Selection
Use the table below to map your starting condition to a YuDa configuration. The grades are relative: Low, Medium, High. Match your realistic startup capacity, volume segment, budget grade, and labor availability, then pick the recommended machine and configuration. This turns the earlier theory into a concrete buying decision.
| Startup capacity (bph) | Volume segment | Budget grade | Labor availability | Recommended YuDa model and configuration |
|---|---|---|---|---|
| 600 to 1,200 | 0.1 to 2.0 L | Low | 2 to 3 people per shift | YuDa Semi-auto Series, single cavity, manual load |
| 1,200 to 2,000 | 0.1 to 2.0 L | Medium | 1 to 2 people per shift | YuDa Semi-auto Series with automatic preform loader |
| 2,000 to 4,000 | 0.2 to 2.0 L | High | 1 person per shift | YuDa Standard Speed Series, entry 2-cavity full automatic |
| Below 600 (trial) | 0.1 to 1.0 L | Low | 2 to 3 people per shift | YuDa Semi-auto Series, single cavity, minimal air set |
| 2,000 to 4,000 (larger bottles) | 2.0 to 3.0 L | High | 1 to 2 people per shift | YuDa Standard Speed Series, 2-cavity, reinforced cooling |
If your case falls between rows, choose the lower grade first. The staged upgrade path means you can move up without discarding your earlier investment in molds and process knowledge. YuDa application engineers can fine-tune this table to your exact preform weight and local power condition before you order.
Service and Support for Beginners
A beginner should weigh support as heavily as the machine price, because the first months decide whether the business survives. YuDa, as a Wanplas factory, backs its machines with the group’s shared service promises, which are especially valuable for first-time operators.
- Bottle shape sampling and trial molding — send your target preform and shape, and YuDa runs a sample blow so you validate the bottle before committing to a mold.
- Pre-shipment testing — every machine is run and checked at the factory before delivery, so it arrives in a known working condition.
- Installation and commissioning — engineers guide setup and the first production runs, including heater profiling and pressure tuning.
- Spare parts policy — the Wanplas group provides USD 500 free parts per year, which covers the small wear items that matter most in the first year.
- Beginner operator training — hands-on training covers daily operation, parameter setting, and basic defect judgment.
- Remote video guidance — when a parameter or fault question appears, remote video support helps you recover quickly without waiting for an on-site visit.
- Open factory visits — you are welcome to visit the factory, see the machines running, and discuss your configuration face to face.
These supports are not marketing extras; for a beginner they are the difference between a line that stalls on the first defect and a line that climbs the yield curve on schedule. The USD 500 free parts per year policy in particular protects you from the small but frequent consumable costs that catch first-time operators off guard. Because YuDa operates inside the Wanplas group, the same service framework applies whether you start on the Semi-auto Series or later move to the Standard Speed Series, so your support relationship does not reset when you upgrade. That continuity is a quiet but real advantage of building the whole ladder with one factory.
Frequently Asked Questions
Do I have to produce PET preforms by myself at the start?
No. For a low budget startup, buying PET preforms from a qualified supplier is strongly recommended. Preform production needs its own injection molding machine, mold, chiller, and crystallizing dryer, which multiplies the investment grade and the skill requirement. Purchasing preforms lets you focus on blowing and reach the market faster.
How large a workshop do I need for a beginner semi-auto line?
A single semi-auto two-step workstation typically fits in a floor area of roughly 20 to 30 square meters, including space for the heater, blow machine, air compressor, and simple bottle collection. Add buffer room for preform storage and packed bottle stacking, and plan for a stable three-phase power supply.
How many people can run a beginner PET bottle blowing line?
A manual semi-auto two-step setup usually needs two to three operators per shift for loading preforms, monitoring the cycle, and collecting bottles. Adding an automatic preform loader reduces labor to about one to two people. An entry-level full automatic machine can run with a single operator per shift.
How long does it take a beginner to get competent?
Most beginners become competent in daily operation within one to two weeks of guided training, including heater temperature setting, blow pressure adjustment, and basic defect judgment. Reaching stable high yield across changing bottle shapes takes roughly one to two months of steady production experience.
Should I buy a used machine or a new machine for the first line?
A new entry-level semi-auto machine gives you a known condition, full warranty, and the group’s USD 500 free parts per year policy, which lowers the risk of unexpected downtime. A used machine may show a lower upfront grade but often hides worn heaters, leaking valves, and unclear maintenance history that raise the real total cost of ownership.
Can my beginner line be upgraded later to higher output?
Yes. A sensible beginner scheme is designed for staged growth: start with single-cavity semi-auto, add an automatic preform loader, then move to a multi-cavity full automatic linear machine. Each step is triggered by a clear order-volume threshold, so you invest only when the market justifies it.
Why is the air compressor called the biggest pitfall for beginners?
Blowing PET bottles consumes a large volume of high-pressure air. If the compressor is undersized, bottles cannot form, the bottle body turns white, and the cycle stretches. Correct air volume estimation by bottle volume and hourly output, plus the right pressure grade and dew point, decides whether the line runs at all.
What bottle shapes are easiest to start with?
Round, symmetrical water and beverage bottles in the 0.3 to 1.5 liter range are the easiest to stabilize because their wall distribution and base support are forgiving. Avoid very asymmetrical, square, or ultra-lightweight designs at the start; keep a small set of generalized bottle shapes to reduce mold changeover time.
Conclusion
A low budget startup in PET bottle blowing is not a compromise; it is a disciplined way to enter the market, learn the process, and scale on evidence. Clarify your local demand, buy preforms instead of making them, pick a small generalized shape set, and start with the YuDa Semi-auto Series on a Low grade before stepping up through the staged path to the YuDa Standard Speed Series full automatic. Size the air compressor correctly from day one, choose a single aluminum cavity to learn on, and use the defect table to climb the yield curve fast. The Wanplas group’s shared support, including USD 500 free parts per year, beginner training, and remote video guidance, keeps a first line running while you build customers. If you are planning your first PET bottle blowing venture, send YuDa your target bottle shape and required capacity and request a low budget configuration suggestion, a sample trial molding, or a factory visit. The right start is the one that matches your real orders, not the most expensive machine on the spec sheet.